大家好,我是冰河~~
最近不少小伙伴想在自己公司的内网搭建一套Maven私服环境,可自己搭建的过程中,或多过少的总会出现一些问题,问我可不可以出一篇如何搭建Maven私服的文章。这不,就有了这篇文章嘛。
好了,其他的不多说了,接下来,我们就一起来搭建Maven私服环境吧!
前提:已安装 JDK8 并配置好了环境变量,小伙伴们自行搭建JDK8环境,这里我就不再赘述了。相信小伙伴们都能够正确搭建JDK8环境。
下载Nexus(这里,我使用的是:nexus-2.11.2-03-bundle.tar.gz) ,下载地址:http://www.sonatype.org/nexus/go/ ,我们也可以在服务器的命令行输入如下命令下载nexus-2.11.2-03-bundle.tar.gz安装文件。
# wget https://sonatype-download.global.ssl.fastly.net/nexus/oss/nexus-2.11.2-03-bundle.tar.gz也可以到链接:https://download.csdn.net/download/l1028386804/12523592 下载
# mkdir nexus# tar -zxvf nexus-2.11.2-03-bundle.tar.gz -C nexus# cd nexus# lsnexus-2.11.2-03 sonatype-work(一个 nexus 服务,一个私有库目录)编辑 Nexus 的 nexus.properties 文件,配置端口和 work 目录信息(保留默认)
# cd nexus-2.11.2-03# lsbin conf lib LICENSE.txt logs nexus NOTICE.txt tmp查看目录结构, jetty 运行
# cd conf# vi nexus.properties# Jetty sectionapplication-port=8081application-host=0.0.0.0nexus-webapp=${bundleBasedir}/nexusnexus-webapp-context-path=/nexus# Nexus sectionnexus-work=${bundleBasedir}/../sonatype-work/nexusruntime=${bundleBasedir}/nexus/WEB-INF# vi /usr/local/nexus/nexus-2.11.2-03/bin/nexus#RUN_AS_USER=改为:
RUN_AS_USER=root# vi /etc/sysconfig/iptables添加:
-A INPUT -m state --state NEW -m tcp -p tcp --dport 8081 -j ACCEPT保存后重启防火墙
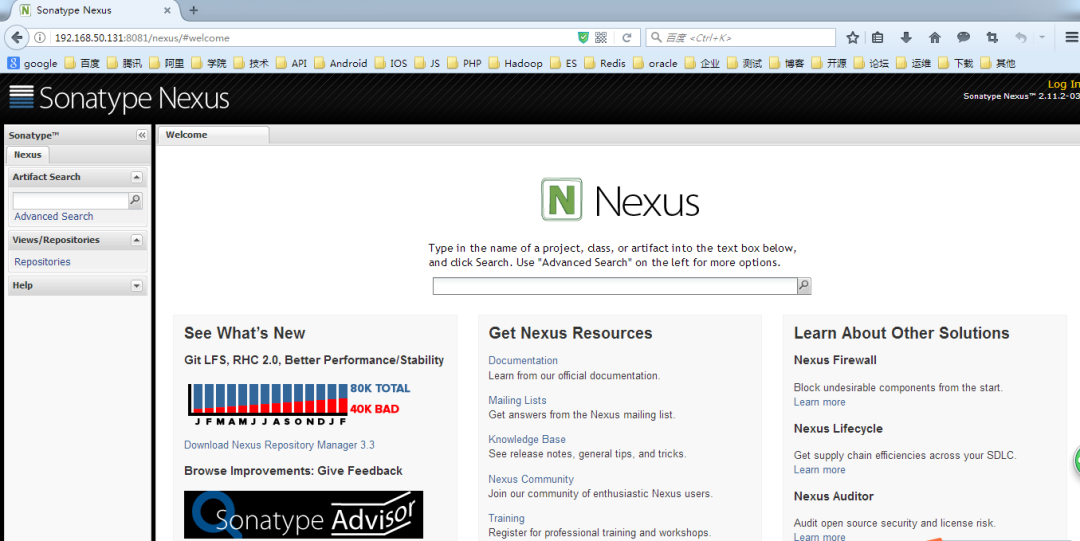
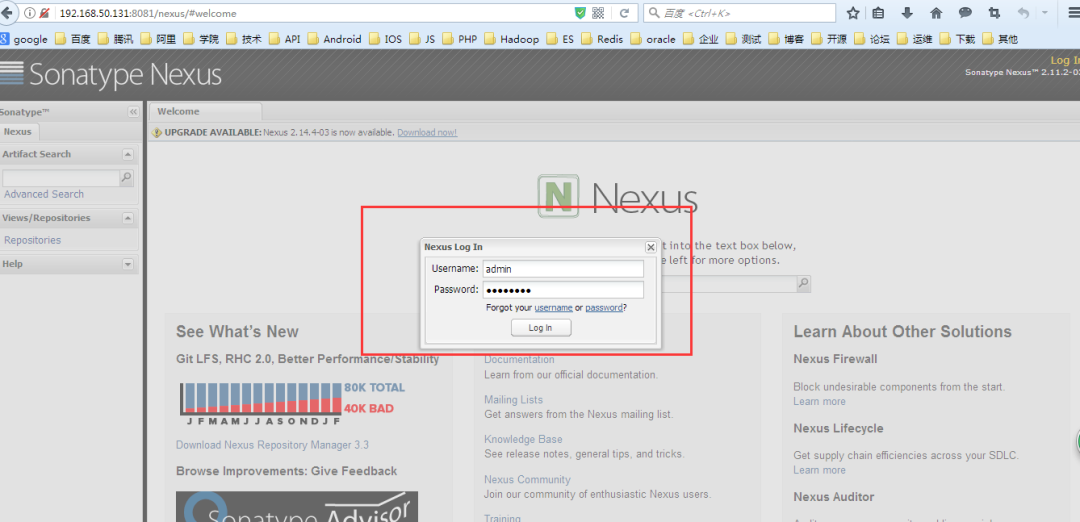
# service iptables restart# /usr/local/nexus/nexus-2.11.2-03/bin/nexus start****************************************WARNING - NOT RECOMMENDED TO RUN AS usr/local****************************************Starting Nexus OSS...Started Nexus OSS.浏览器中打开:http://192.168.50.131:8081/nexus/
默认用户名admin,默认密码admin123。
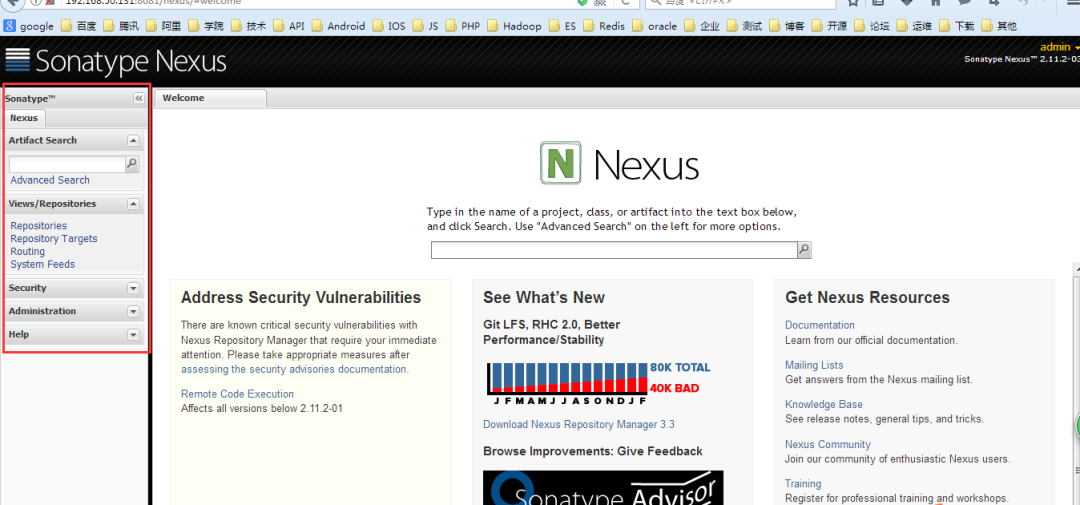
到此, Nexus 已安装完成, 接下来是 Nexus 的配置
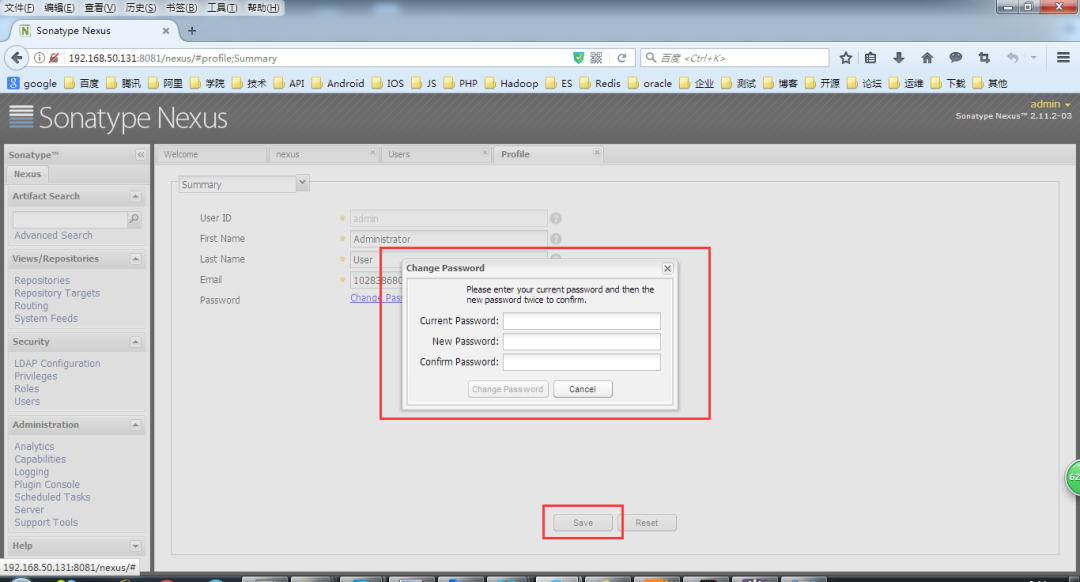
菜单 Administration/Server 配置邮箱服务地址(如果忘记密码,可以通过该邮箱找回密码)
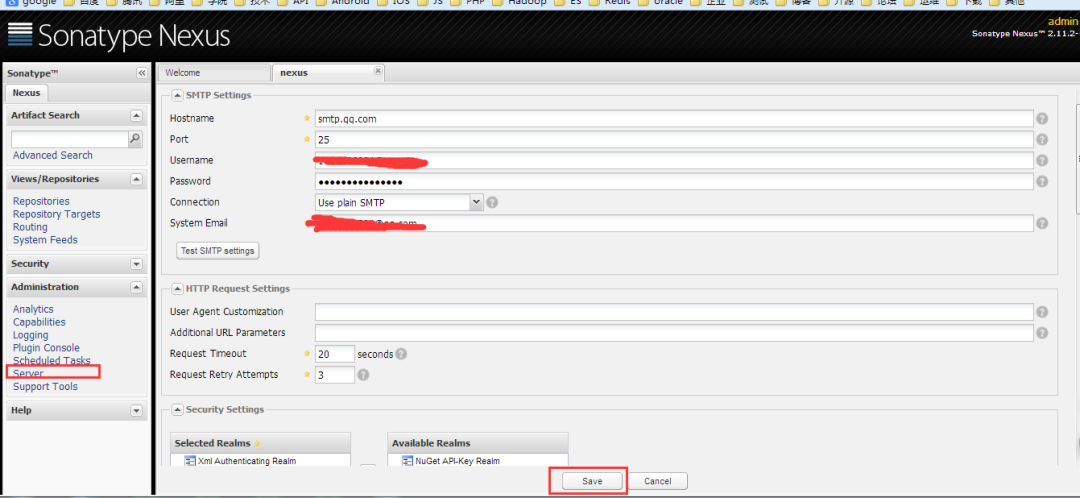
给用户配置邮箱地址,方便忘记密码时找回:
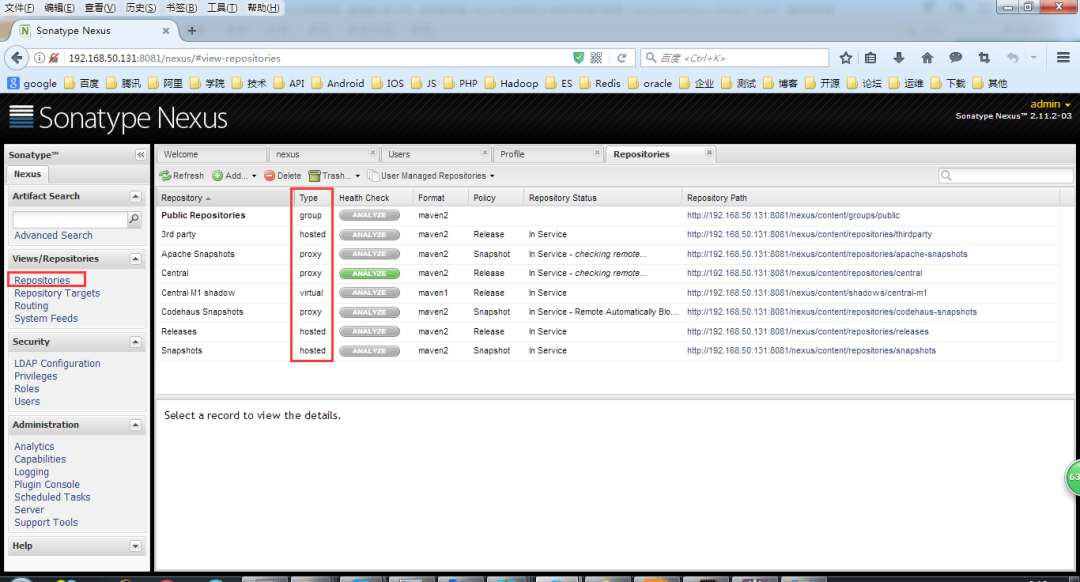
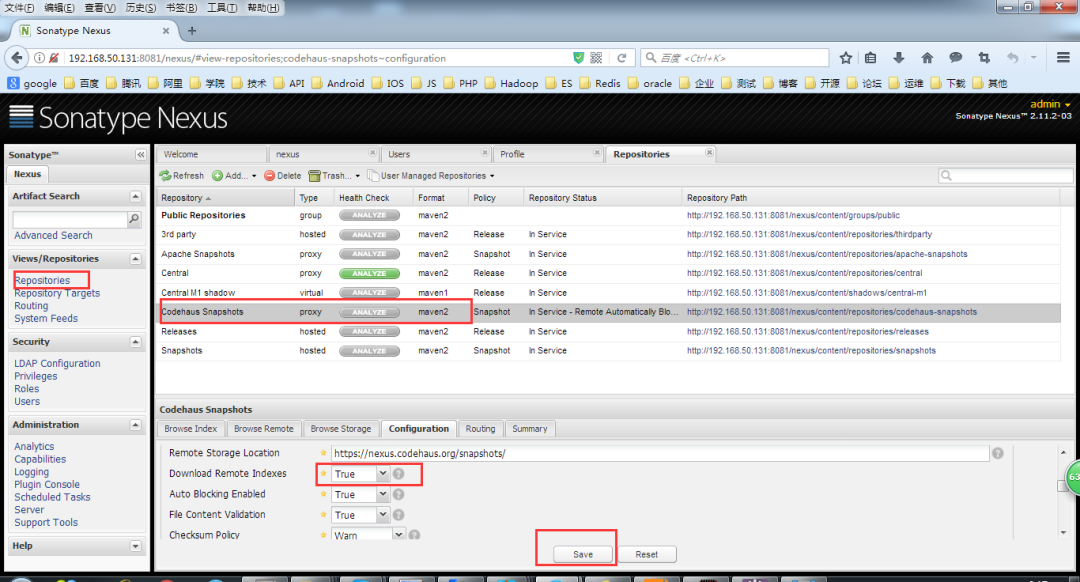
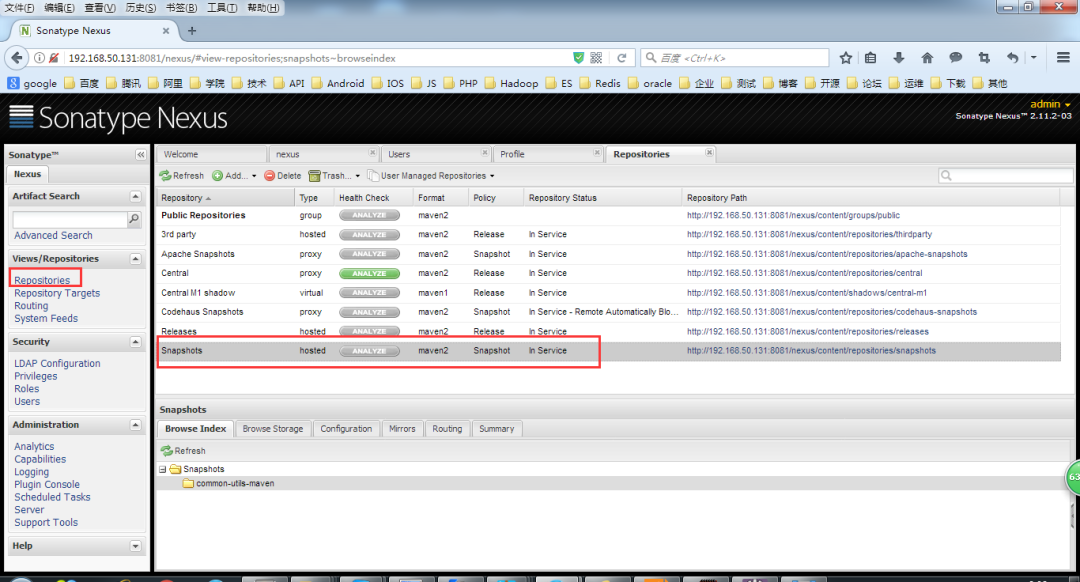
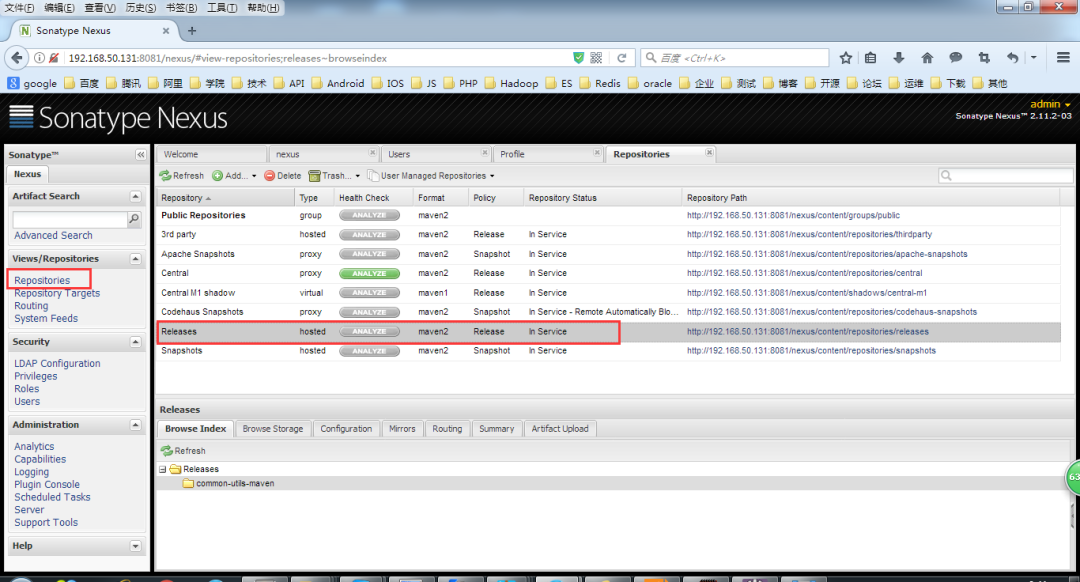
一般用到的仓库种类是 hosted、 proxy。
Hosted 仓库常用类型说明:
如果构建的 Maven 项目本地仓库没有对应的依赖包,那么就会去 Nexus 私服去下载,如果Nexus私服也没有此依赖包,就回去远程中央仓库下载依赖,这些中央仓库就是 proxy。Nexus 私服下载成功后再下载至本地 Maven 库供项目引用。
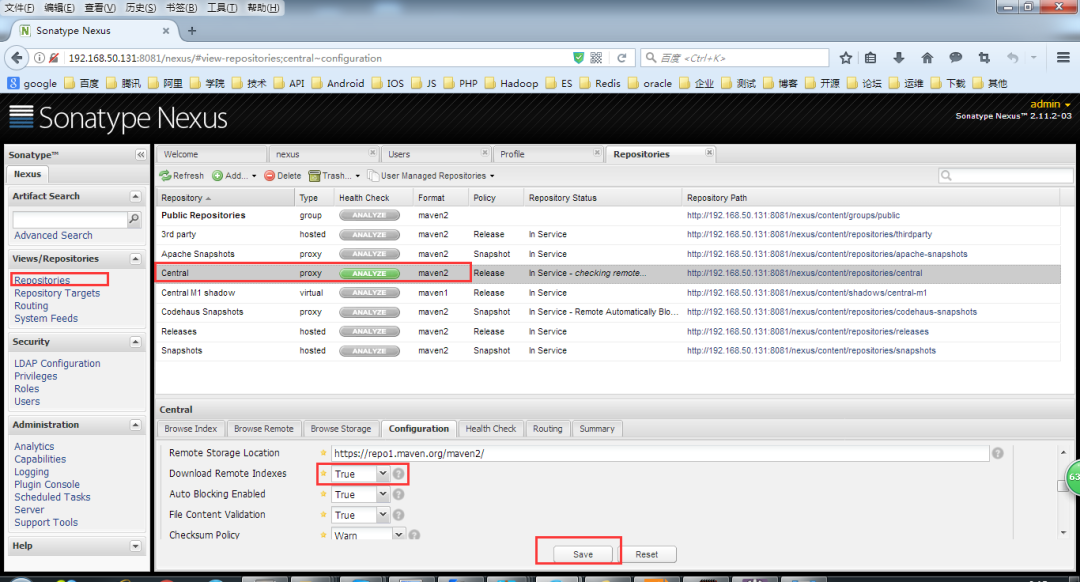
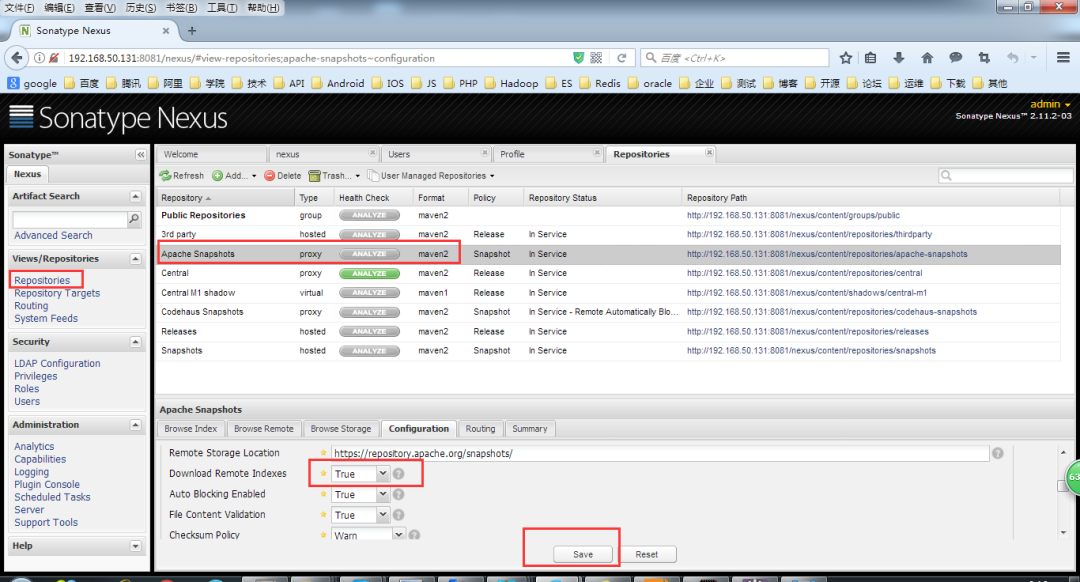
设置 proxy 代理仓库(Apache Snapshots/Central/Codehaus Snapshots)准许远程下载,如下所示。
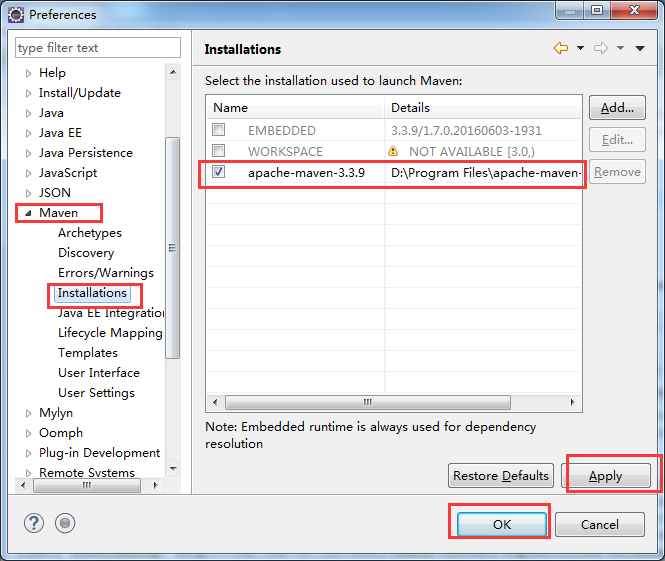
到链接http://maven.apache.org/download.cgi 下载Maven
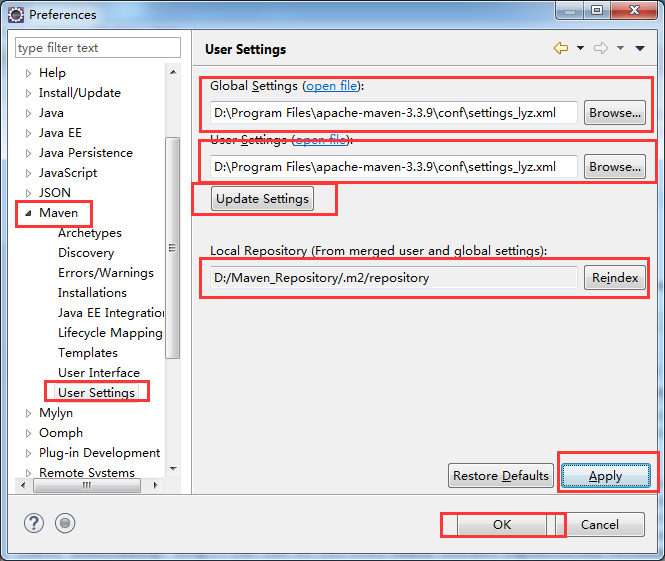
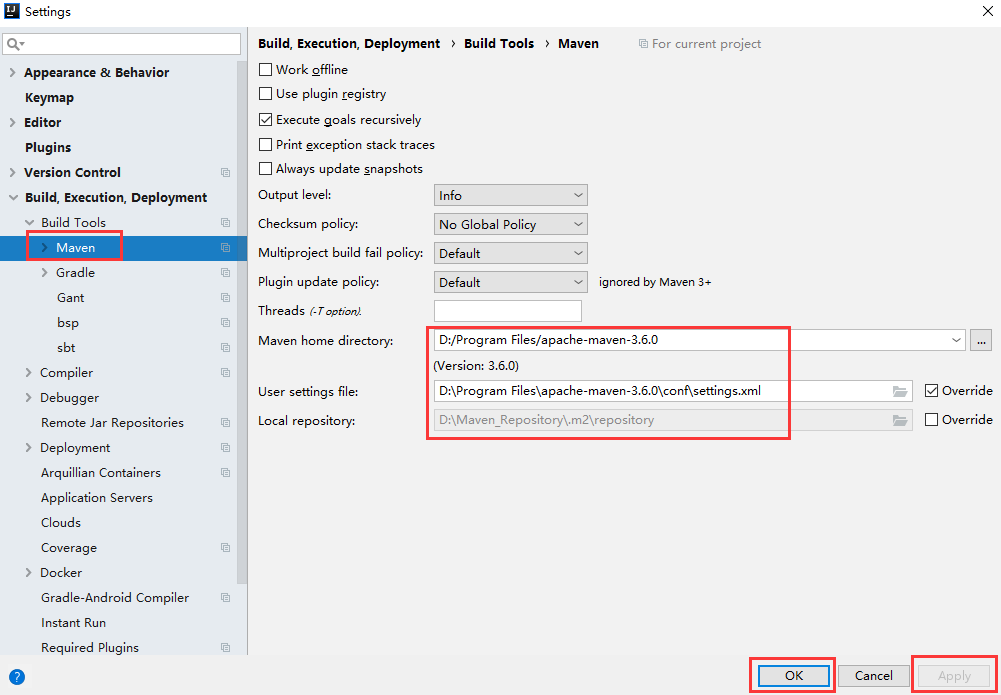
vim /etc/profileMAVEN_HOME=/usr/local/mavenJAVA_HOME=/usr/local/jdkCLASS_PATH=$JAVA_HOME/libPATH=$JAVA_HOME/bin:$MAVEN_HOME/bin:$PATHexport JAVA_HOME MAVEN_HOME CLASS_PATH PATHsource /etc/profile拷贝Maven的conf目录下的配置文件settings.xml,重命名为settings-lyz.xml,修改配置文件后的内容如下:
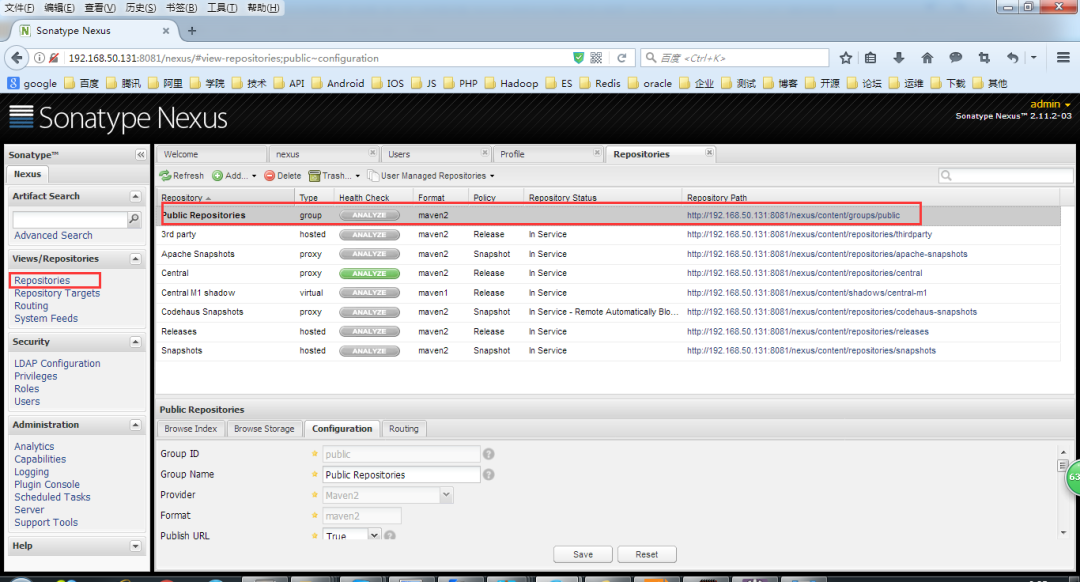
<?xml version="1.0" encoding="UTF-8"?><settings xmlns="http://maven.apache.org/SETTINGS/1.0.0" xmlns:xsi="http://www.w3.org/2001/XMLSchema-instance" xsi:schemaLocation="http://maven.apache.org/SETTINGS/1.0.0 http://maven.apache.org/xsd/settings-1.0.0.xsd"> <localRepository>D:/Maven_Repository/.m2/repository</localRepository> <interactiveMode>true</interactiveMode> <offline>false</offline> <pluginGroups> <pluginGroup>org.mortbay.jetty</pluginGroup> <pluginGroup>org.jenkins-ci.tools</pluginGroup> </pluginGroups> <!--配置权限,使用默认用户--> <servers> <server> <id>nexus-releases</id> <username>deployment</username> <password>deployment123</password> </server> <server> <id>nexus-snapshots</id> <username>deployment</username> <password>deployment123</password> </server> </servers> <mirrors> </mirrors> <profiles> <profile> <id>lyz</id> <activation> <activeByDefault>false</activeByDefault> <jdk>1.8</jdk> </activation> <repositories> <!-- 私有库地址--> <repository> <id>nexus</id> <url>http://192.168.50.131:8081/nexus/content/groups/public/</url> <releases> <enabled>true</enabled> </releases> <snapshots> <enabled>true</enabled> </snapshots> </repository> </repositories> <pluginRepositories> <!--插件库地址--> <pluginRepository> <id>nexus</id> <url>http://192.168.50.131:8081/nexus/content/groups/public/</url> <releases> <enabled>true</enabled> </releases> <snapshots> <enabled>true</enabled> </snapshots> </pluginRepository> </pluginRepositories> </profile> </profiles> <!--激活profile--> <activeProfiles> <activeProfile>lyz</activeProfile> </activeProfiles></settings>其中,配置文件中的
<localRepository>D:/Maven_Repository/.m2/repository</localRepository>说明本地仓库位于D:/Maven_Repository/.m2/repository目录下。
配置文件中的如下配置项。
<url>http://192.168.50.131:8081/nexus/content/groups/public/</url>与下图中的链接一致:

首先我们要在项目的pom.xml文件中加入如下内容,将项目构建成的Jar发布到Maven私有仓库
<distributionManagement> <repository> <id>nexus-releases</id> <name>Nexus Release Repository</name> <url>http://192.168.50.131:8081/nexus/content/repositories/releases/</url> </repository> <snapshotRepository> <id>nexus-snapshots</id> <name>Nexus Snapshot Repository</name> <url>http://192.168.50.131:8081/nexus/content/repositories/snapshots/</url> </snapshotRepository></distributionManagement>配置说明
项目中的pom.xml文件中,如果版本配置如下:
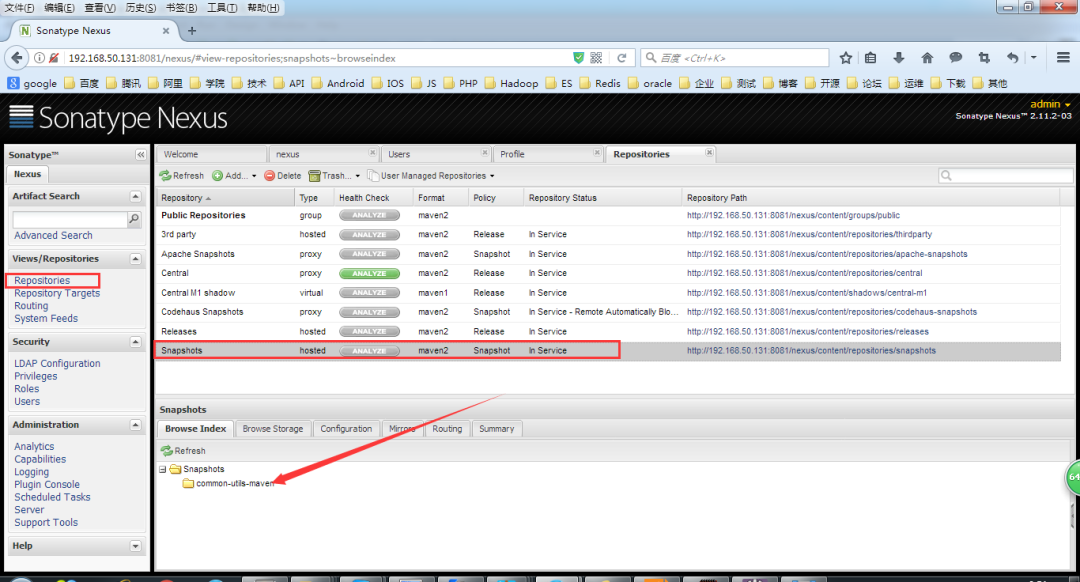
<version>0.0.1-SNAPSHOT</version>则发布到Maven私有仓库后对应的目录如下:
如果版本配置如下:
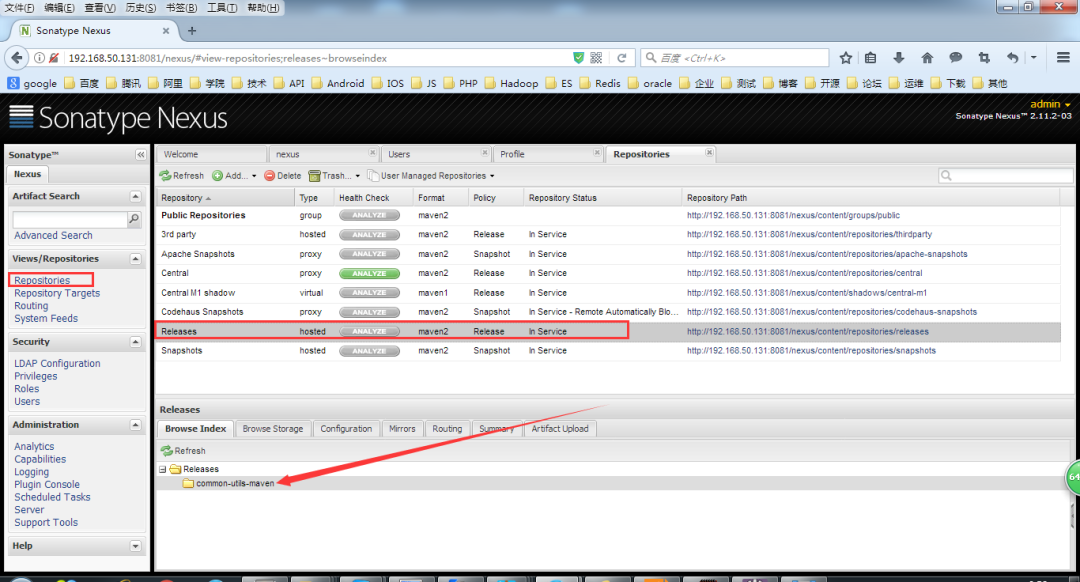
<version>0.0.1-RELEASE</version>则发布到Maven私有仓库后对应的目录如下。
完整pom.xml文件的配置如下所示。
<project xmlns="http://maven.apache.org/POM/4.0.0" xmlns:xsi="http://www.w3.org/2001/XMLSchema-instance" xsi:schemaLocation="http://maven.apache.org/POM/4.0.0 http://maven.apache.org/xsd/maven-4.0.0.xsd"> <modelVersion>4.0.0</modelVersion> <groupId>common-utils-maven</groupId> <artifactId>com.chwl.common</artifactId> <version>0.0.1-SNAPSHOT</version> <distributionManagement> <repository> <id>nexus-releases</id> <name>Nexus Release Repository</name> <url>http://192.168.50.131:8081/nexus/content/repositories/releases/</url> </repository> <snapshotRepository> <id>nexus-snapshots</id> <name>Nexus Snapshot Repository</name> <url>http://192.168.50.131:8081/nexus/content/repositories/snapshots/</url> </snapshotRepository> </distributionManagement> <properties> <project.build.sourceEncoding>UTF-8</project.build.sourceEncoding> <jdk.version>1.8</jdk.version> </properties> <dependencies> 此处省略.... </dependencies> <build> <plugins> <plugin> <groupId>org.apache.maven.plugins</groupId> <artifactId>maven-compiler-plugin</artifactId> <configuration> <source>${jdk.version}</source> <target>${jdk.version}</target> <encoding>${project.build.sourceEncoding}</encoding> </configuration> </plugin> <plugin> <groupId>org.apache.maven.plugins</groupId> <artifactId>maven-source-plugin</artifactId> <version>2.1.2</version> <executions> <execution> <id>attach-sources</id> <goals> <goal>jar</goal> </goals> </execution> </executions> </plugin> </plugins> </build></project>具体发布步骤如下:
右键pom.xml->Run as->Maven build->
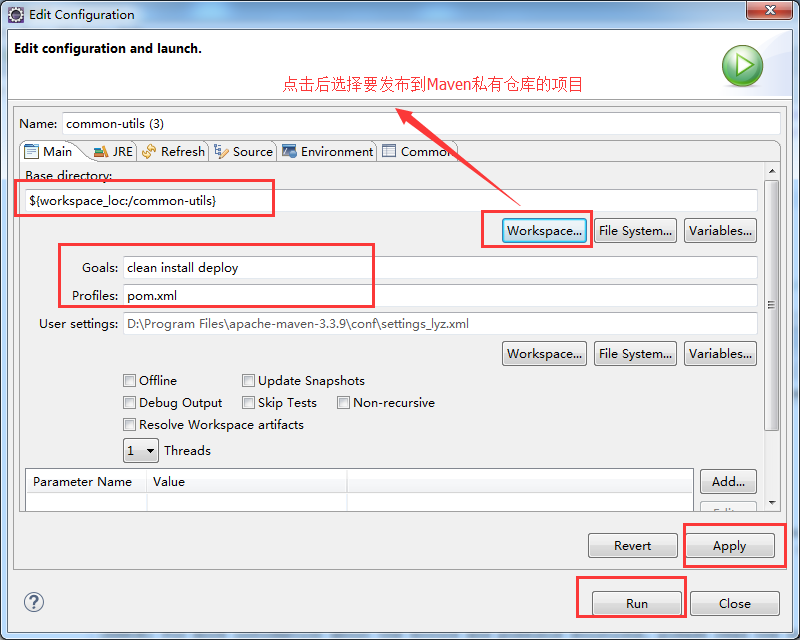
上图中的私有库为空,我们右键pom.xml->Run as->Maven build(此时pom.xml文件的version为0.0.1-SNAPSHOT)。
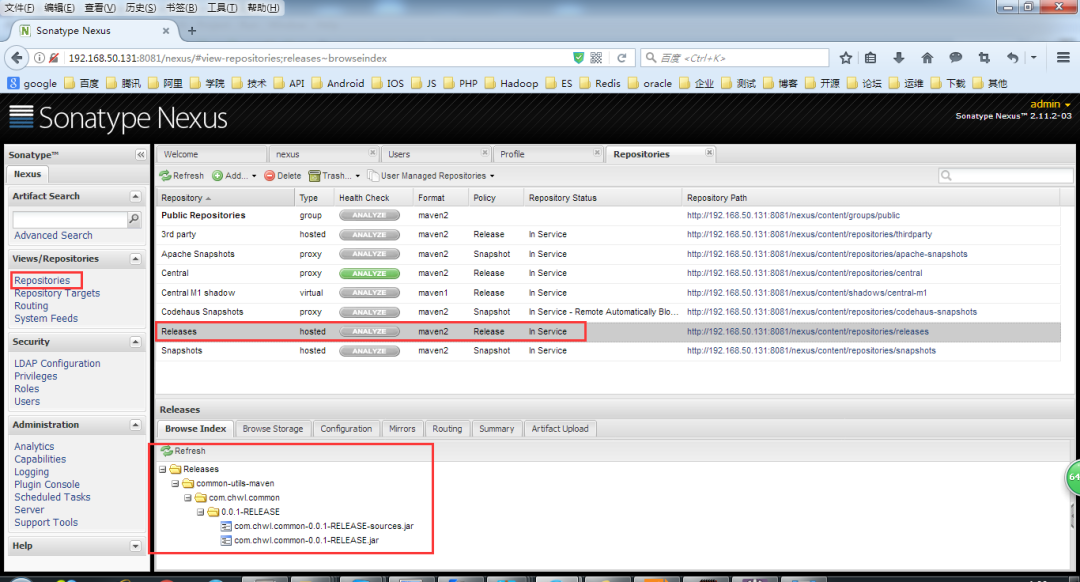
构建完毕后

说明已经将项目构建并发布到了我们的Maven私有仓库。
此时,上图中的Release目录为空,此时,我们修改pom.xml的version为0.0.1-RELEASE,再次右键pom.xml->Run as->Maven build,构建项目,此时发布的目录如下图:
说明已经将项目构建并发布到了我们的Maven私有仓库。
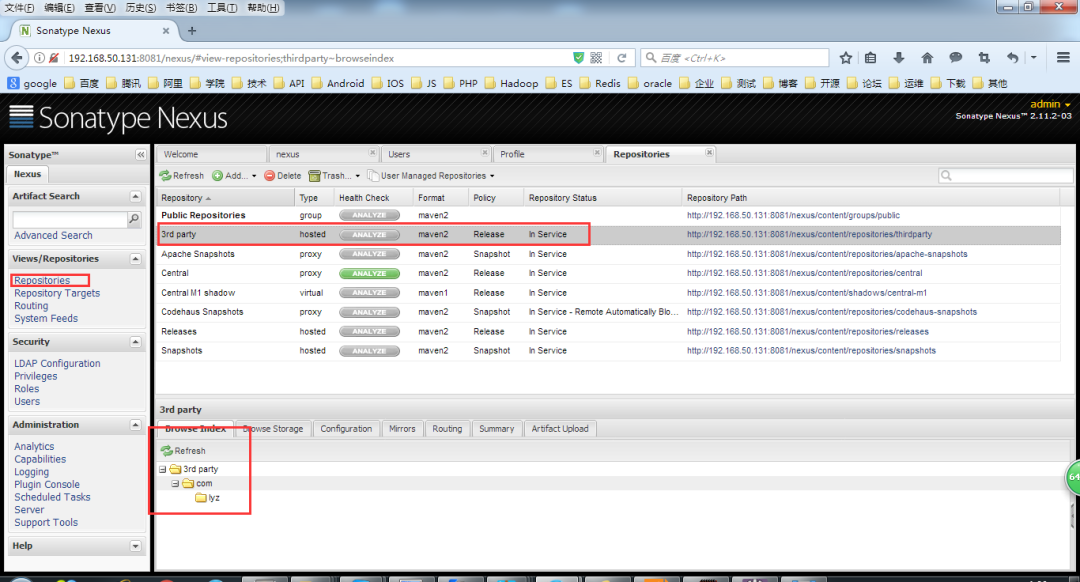
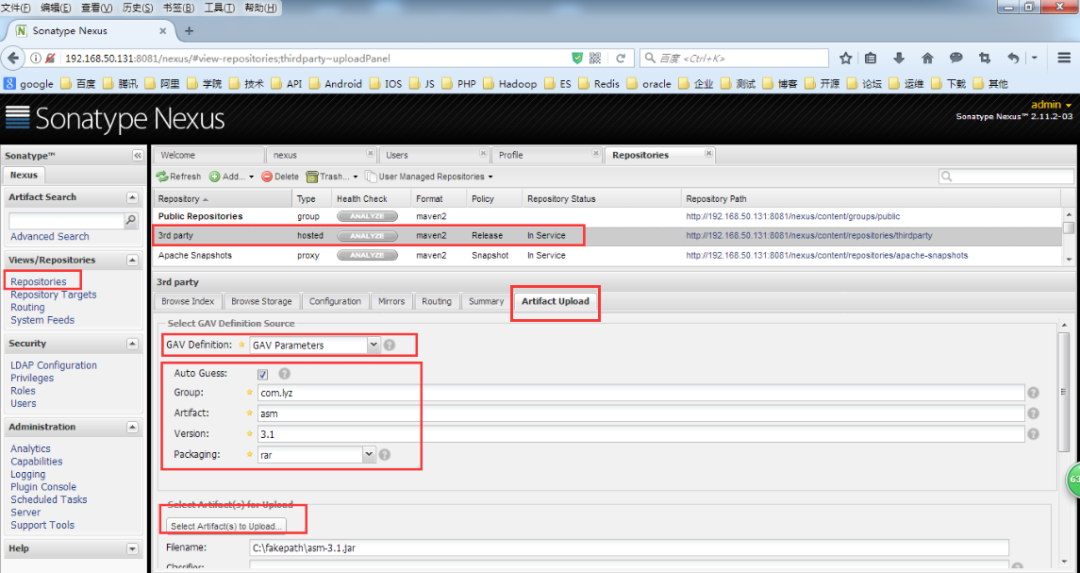
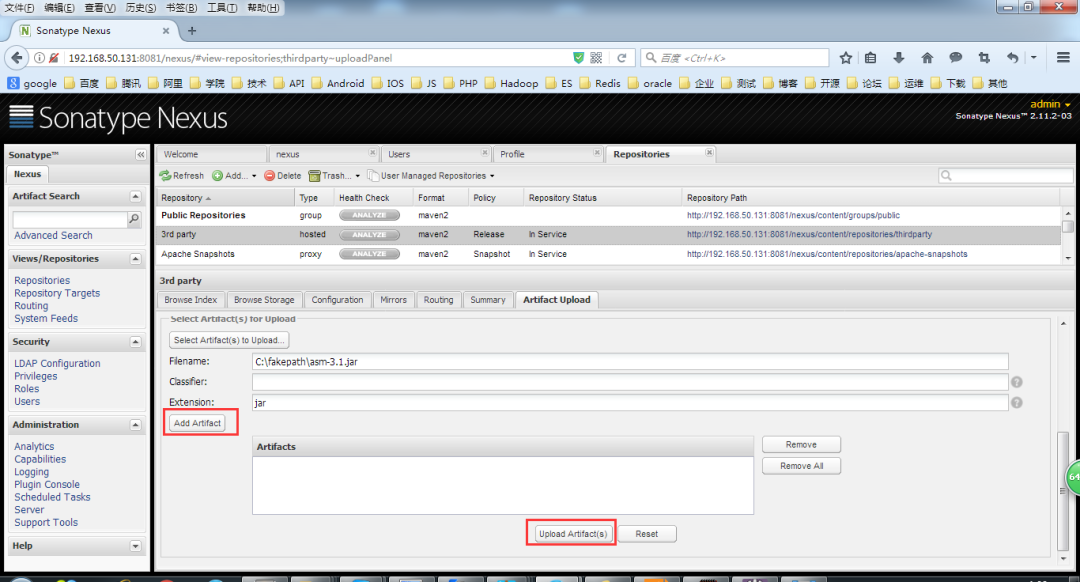
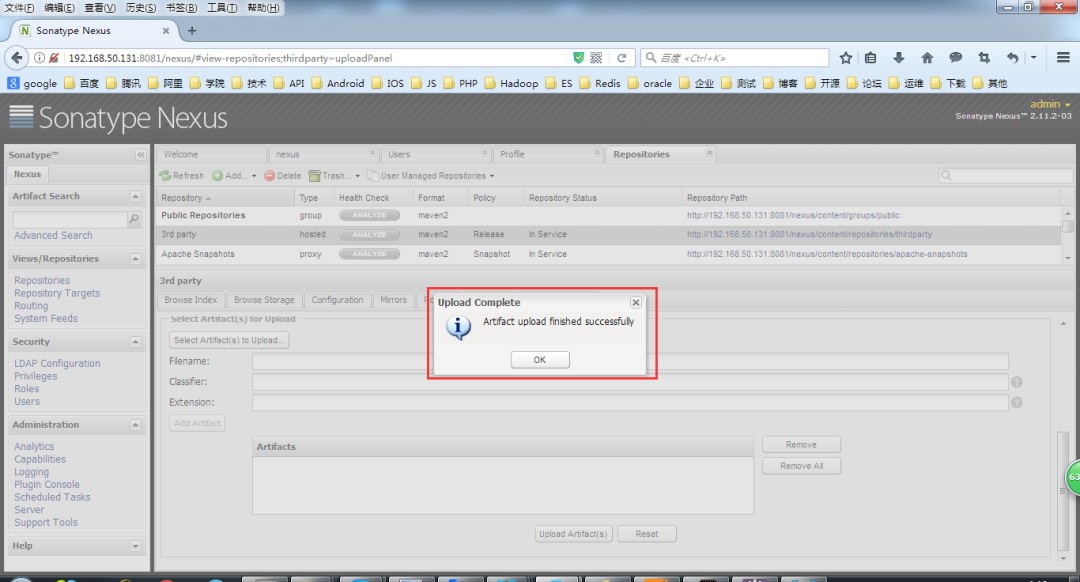
最后,我们添加第三方的Jar依赖到我们的Maven私有仓库,具体操作如下:
如上图,第三方依赖私有仓库为空,我们按照以下步骤上传第三方依赖到我们的Maven私有仓库。
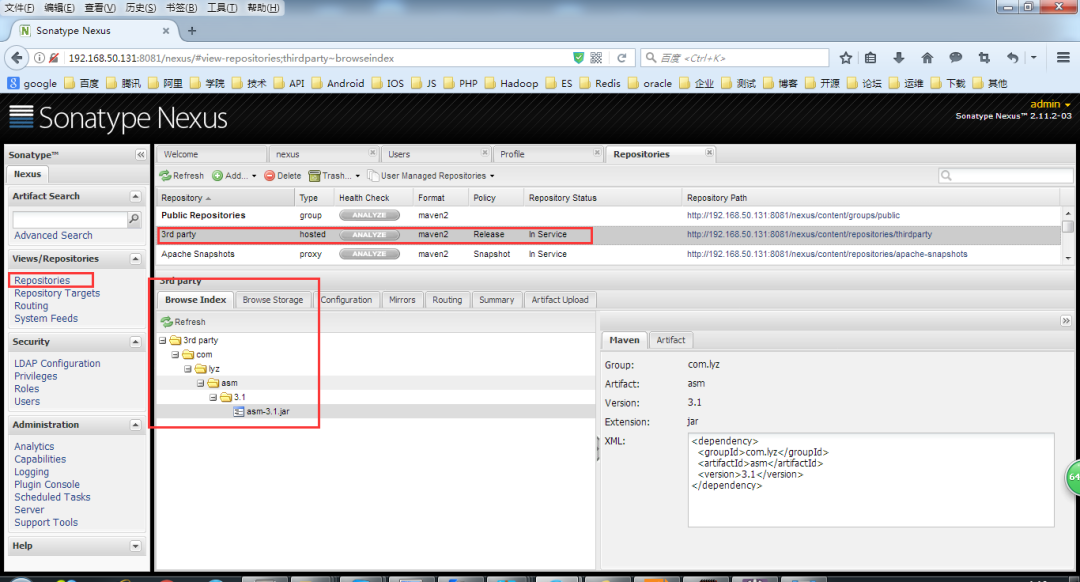
如上图,第三方依赖已经上传到我们的Maven私有仓库。
至此,Maven 私有库和本地库的安装与配置到此结束。
好了,今天就到这儿吧,我是冰河,我们下期见~~