$ kubectl create ns argo$ kubectl apply -n argo -f https://raw.githubusercontent.com/argoproj/argo-workflows/master/manifests/quick-start-postgres.yaml$ kubectl get all -n argo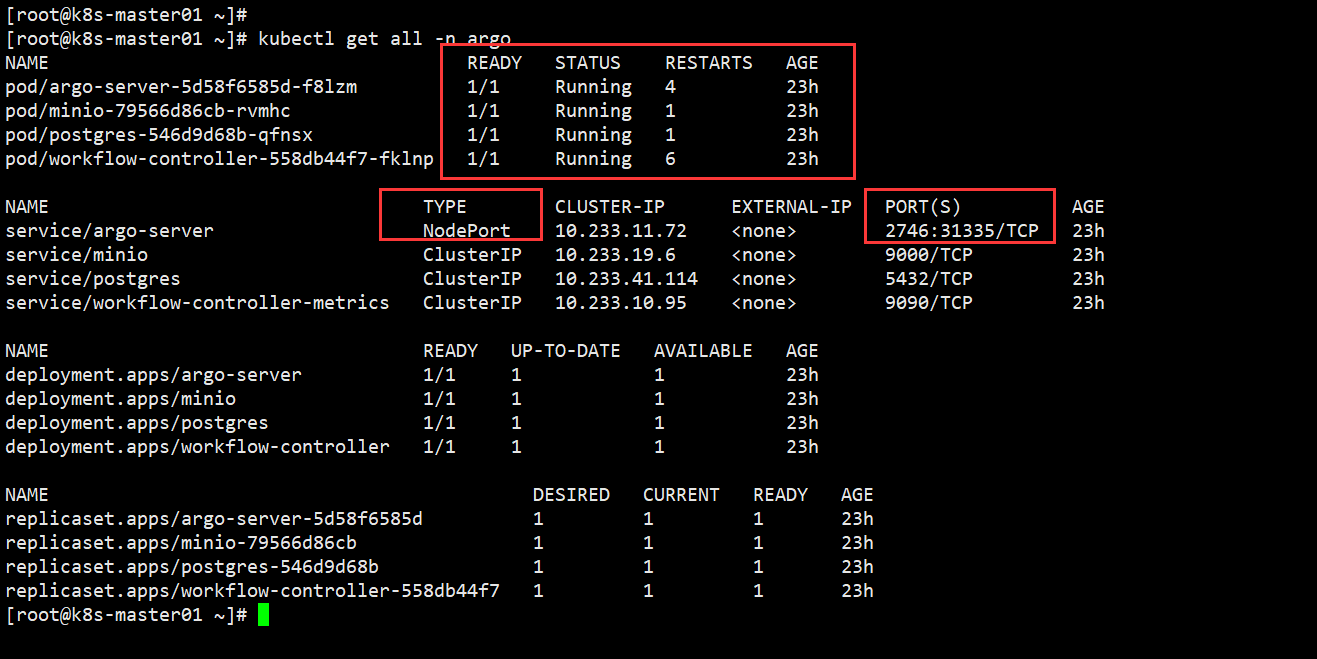
$ kubectl edit svc argo-server -n argo... selector: app: argo-server sessionAffinity: None type: NodePort # 修改为 NodePortstatus:...保存退出跟 vim 操作一样,成功退出后等待即可。
[root@k8s-master01 ~]# kubectl get svc -n argoNAME TYPE CLUSTER-IP EXTERNAL-IP PORT(S) AGEservice/argo-server NodePort 10.233.11.72 <none> 2746:31335/TCP 23h...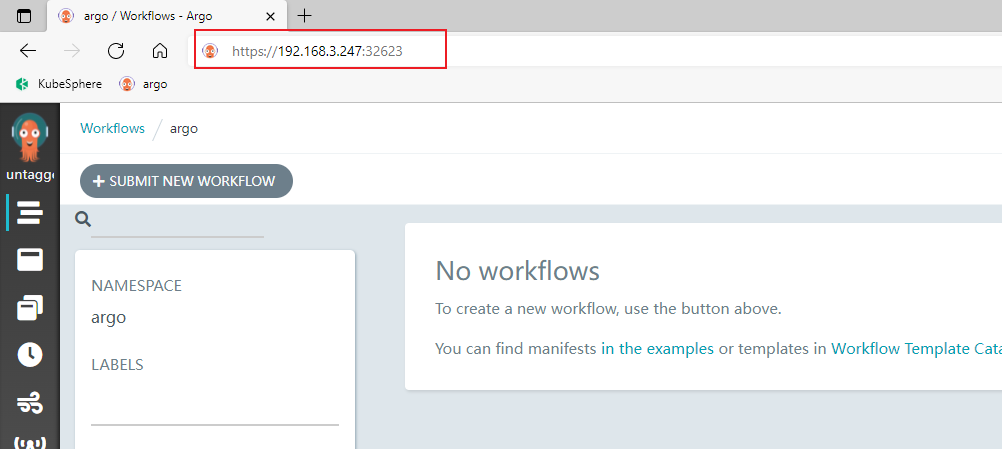
$ curl -sLO https://github.com/argoproj/argo/releases/download/v3.0.2/argo-linux-amd64.gz$ gunzip argo-linux-amd64.gz$ chmod +x argo-linux-amd64$ mv ./argo-linux-amd64 /usr/local/bin/argo$ argo version其他版本链接:https://github.com/argoproj/argo-workflows/releases
我安装 v3.2.8 版本时,在命令行创建 workflow 的时候,一直卡住不动,UI 界面也不同步 workflow,后面换一个低点版本就解决该问题了。
如果你也遇到我类似的问题,可以试着换个版本试试。
构建工作流
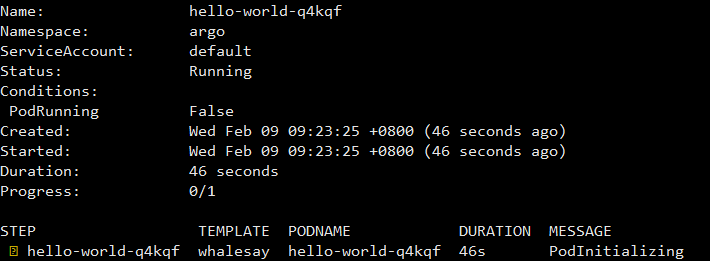
[root@k8s-master01 argo]# argo submit -n argo --watch https://raw.githubusercontent.com/argoproj/argo-workflows/master/examples/hello-world.yamlhello-world.yaml配置文件解析
apiVersion: argoproj.io/v1alpha1kind: Workflowmetadata: generateName: hello-world- # workflow 名字 labels: # 标签 workflows.argoproj.io/archive-strategy: "false" annotations: # 为用户添加的额外注解 workflows.argoproj.io/description: | This is a simple hello world example. You can also run it in Python: https://couler-proj.github.io/couler/examples/#hello-worldspec: entrypoint: whalesay # 表示第一个执行的模板名称,让工作流知道从哪个模板开始执行,类似于 main 函数 templates: # 以下是模板内容 - name: whalesay # 模板名称 container: # 容器内容 image: docker/whalesay:latest # 调用 docker/whalesay 镜像 command: [cowsay] # 调用 cowsay 命令 args: ["hello world"] # 执行内容Pod 初始化
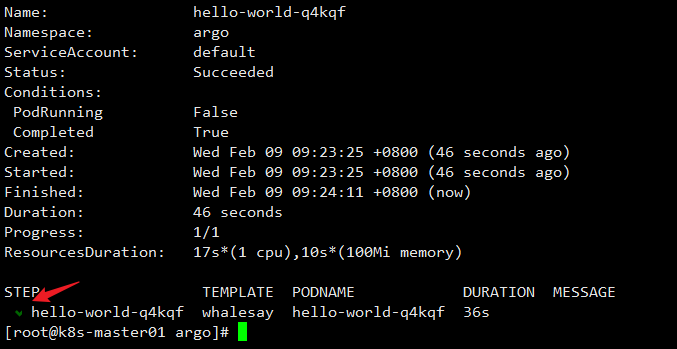
工作流完成
查看 Pod Logs
[root@k8s-master01 argo]# argo logs -n argo @latest# @latest 查看最新工作流log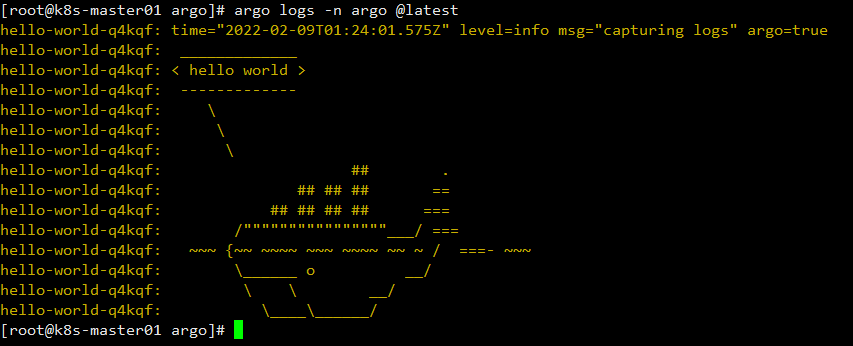
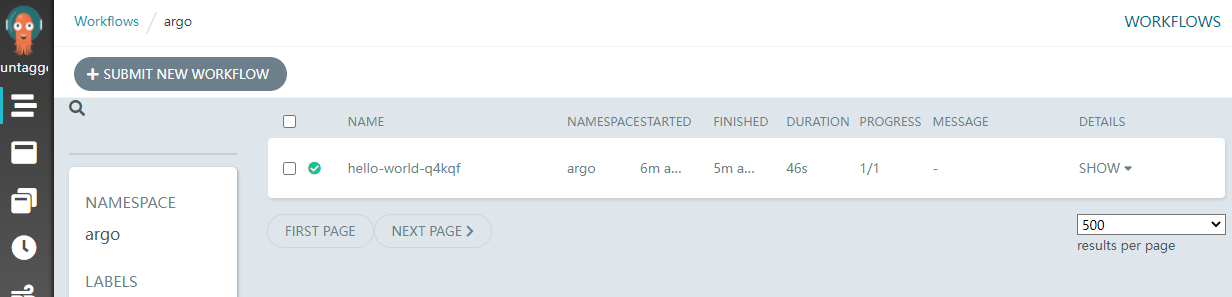
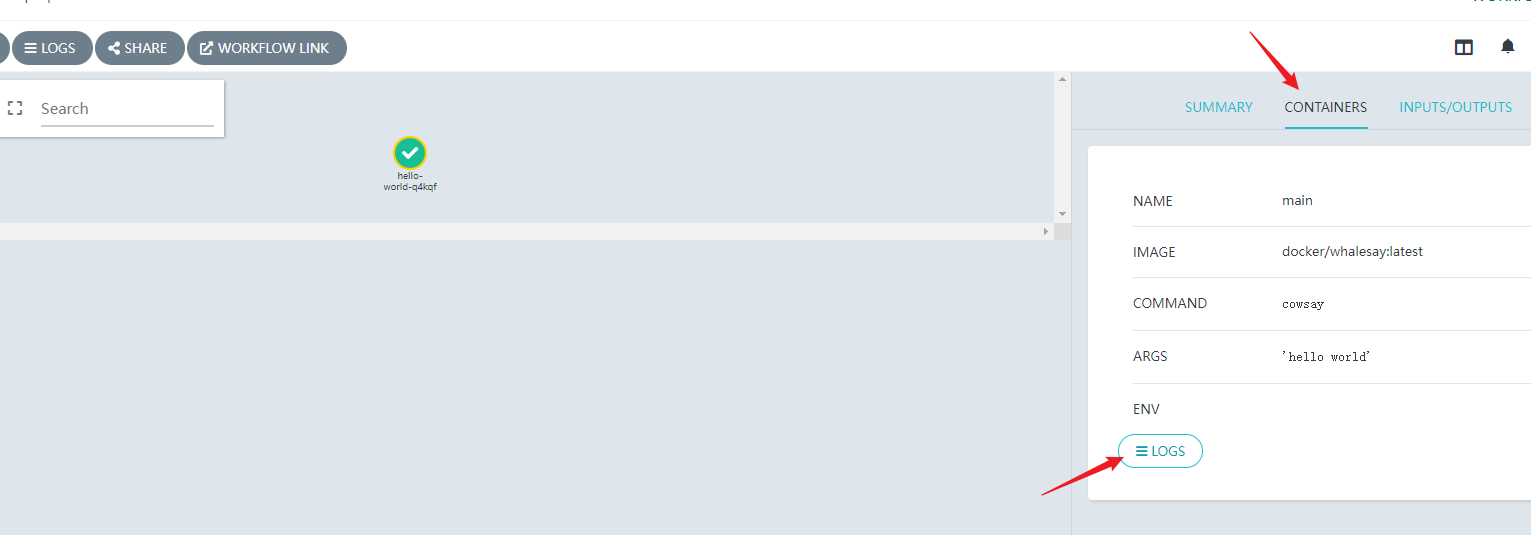
Argo UI 也可以同步查看 Pod 运行信息
接下来练习稍微复杂点的 Workflow,hello-hello-hello.yml配置文件解析
apiVersion: argoproj.io/v1alpha1kind: Workflowmetadata: generateName: steps- # Workflow 的名称前缀spec: entrypoint: hello-hello-hello # 表示第一个执行的模板名称,让工作流知道从哪个模板开始执行,类似于 main 函数 # 该templates中有两个模板,分别是:hello-hello-hello和whalesay templates: - name: hello-hello-hello # 第一个模板 hello-hello-hello steps: # template 的类型是 steps # 一个 template 有多种类型,分别为:container、script、dag、steps、resource、suspend - - name: hello1 # 在 steps 类型中,[--] 表示顺序执行,[-] 表示并行执行 template: whalesay # 引用 whalesay 模板 arguments: parameters: - name: message value: "hello1" - - name: hello2a # [--] 顺序执行 template: whalesay arguments: parameters: - name: message value: "hello2a" - name: hello2b # [-] 表示跟上一步并行运行 template: whalesay arguments: parameters: - name: message value: "hello2b" - name: whalesay # 第二个模板 whalesay inputs: # input、output 实现数据交互 parameters: - name: message container: image: docker/whalesay # 镜像名称 command: [cowsay] # 执行命令 args: ["{{inputs.parameters.message}}"] # 执行的 value构建 workflow
[root@k8s-master01 argo]# lshello-hello-hello.yml hello-world.yaml[root@k8s-master01 argo]# argo submit -n argo hello-hello-hello.yml --watch# submit 创建工作流# -n argo 存放的命名空间# --watch 实时监听工作流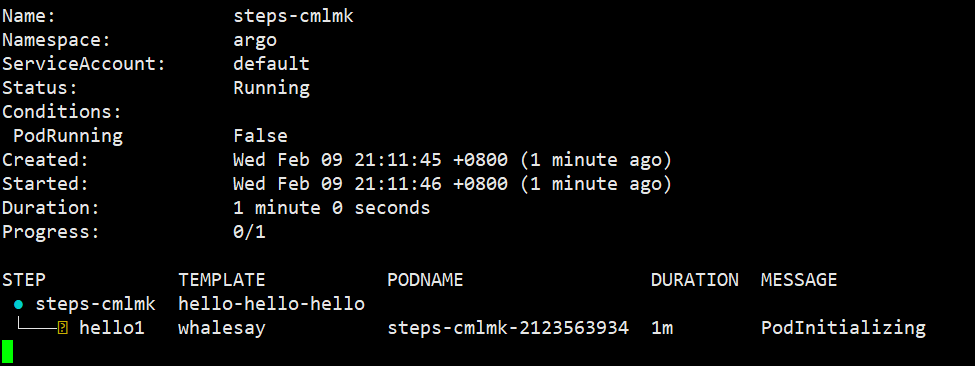
在 Argo Web 界面查看,此时工作流正在构建中

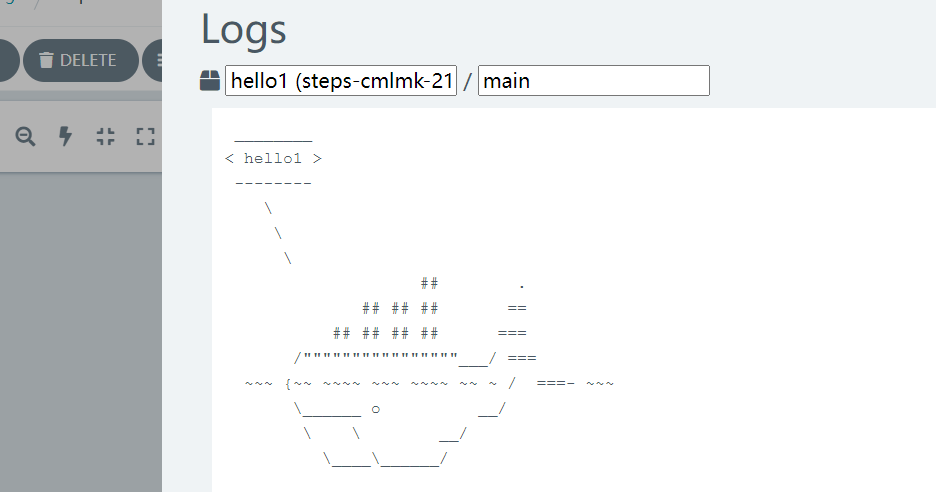
第一个 hello 已经执行完成,并打印相应的信息
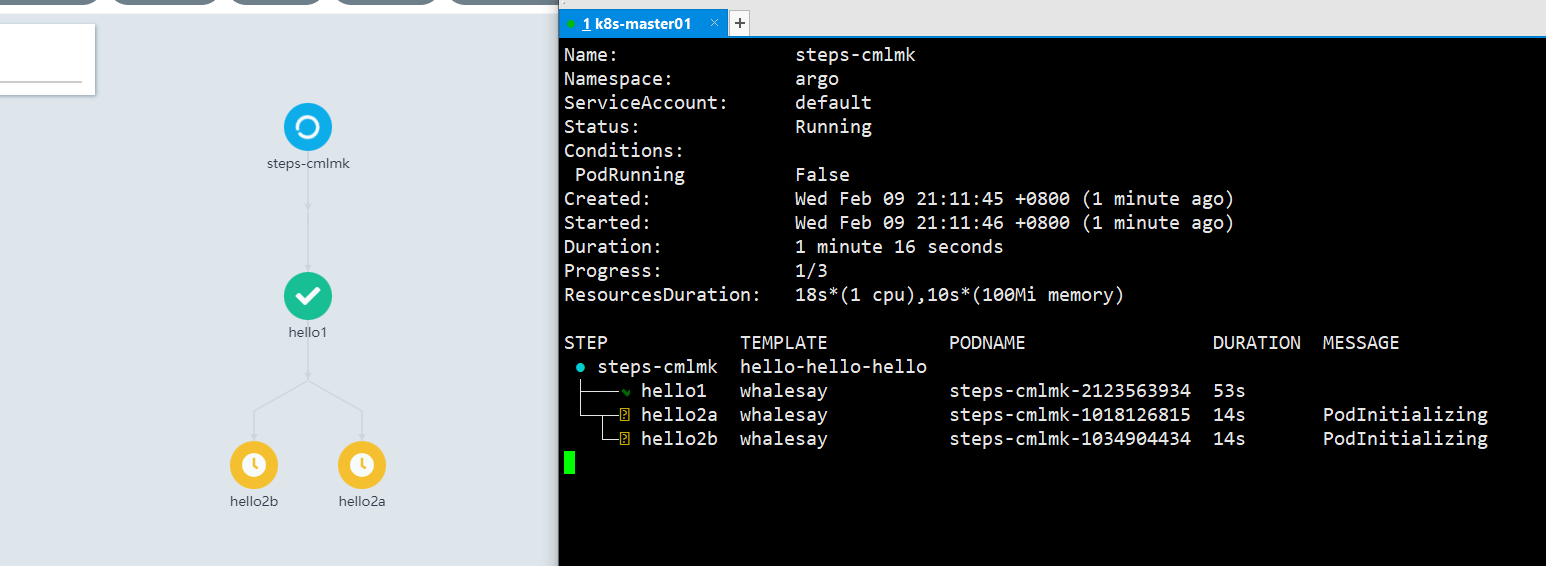
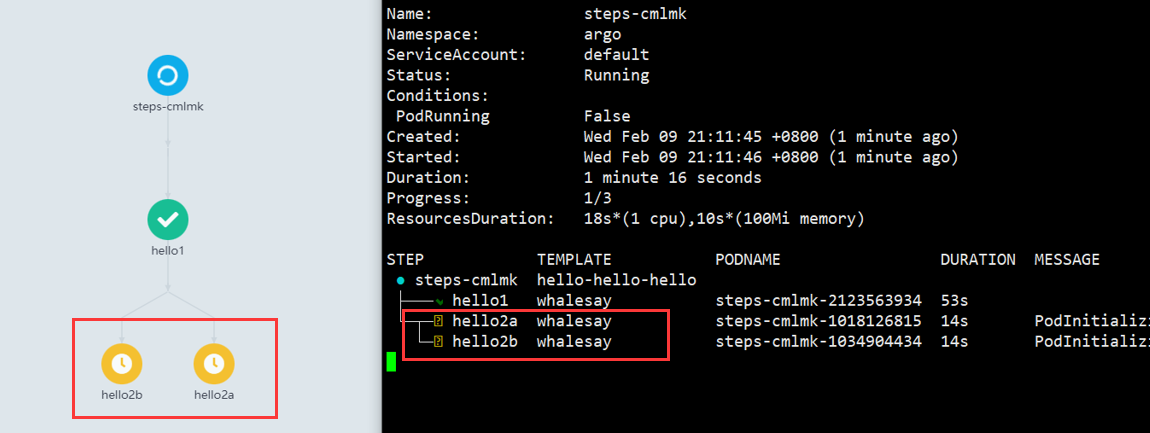
第一个完成之后,接下来 hello2a 和 hello2b 会并行执行
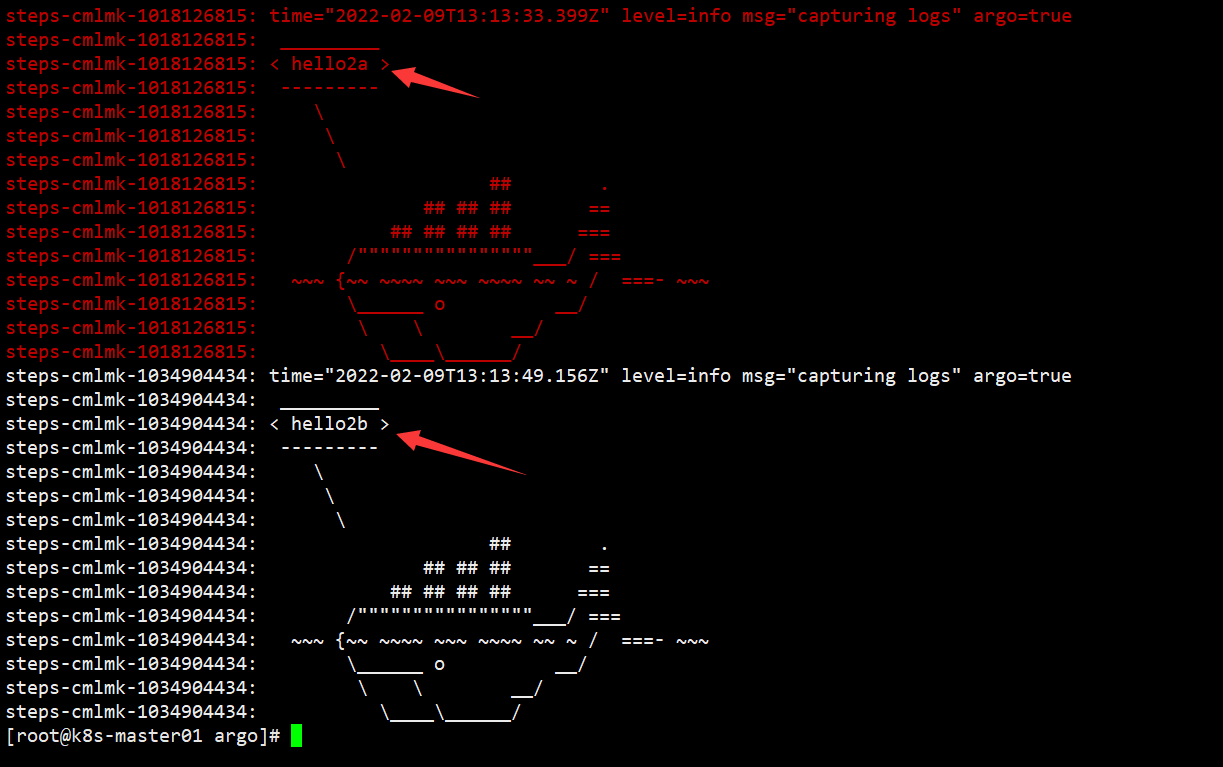
hello2a 和 hello2b 都会打印相关信息,然后结束整个workflow
以上非常基础的 Argo Workflow 学习,连门都没入,希望能和大佬们交流交流。
作者:神奇二进制
文章出处:https://www.cnblogs.com/l-hh/
本文版权归作者和博客园共有,欢迎转载,但未经作者同意必须保留此段声明,且在文章页面明显位置给出原文链接,否则保留追究法律责任的权利。
文章如有叙述不当的地方,欢迎指正。如果觉得文章对你有帮助,可以精神上的支持 [推荐] 或者 [关注我] ,一起交流,共同进步!